Admin Guide · Setup
Imports and exports
Data Management moves your tenant's configuration and records as files, in and out, with results reported row by row. Scroll through the three tabs and what each one hands you.
- Tabs
- Choose
- Export
- Import
- Users
Scroll
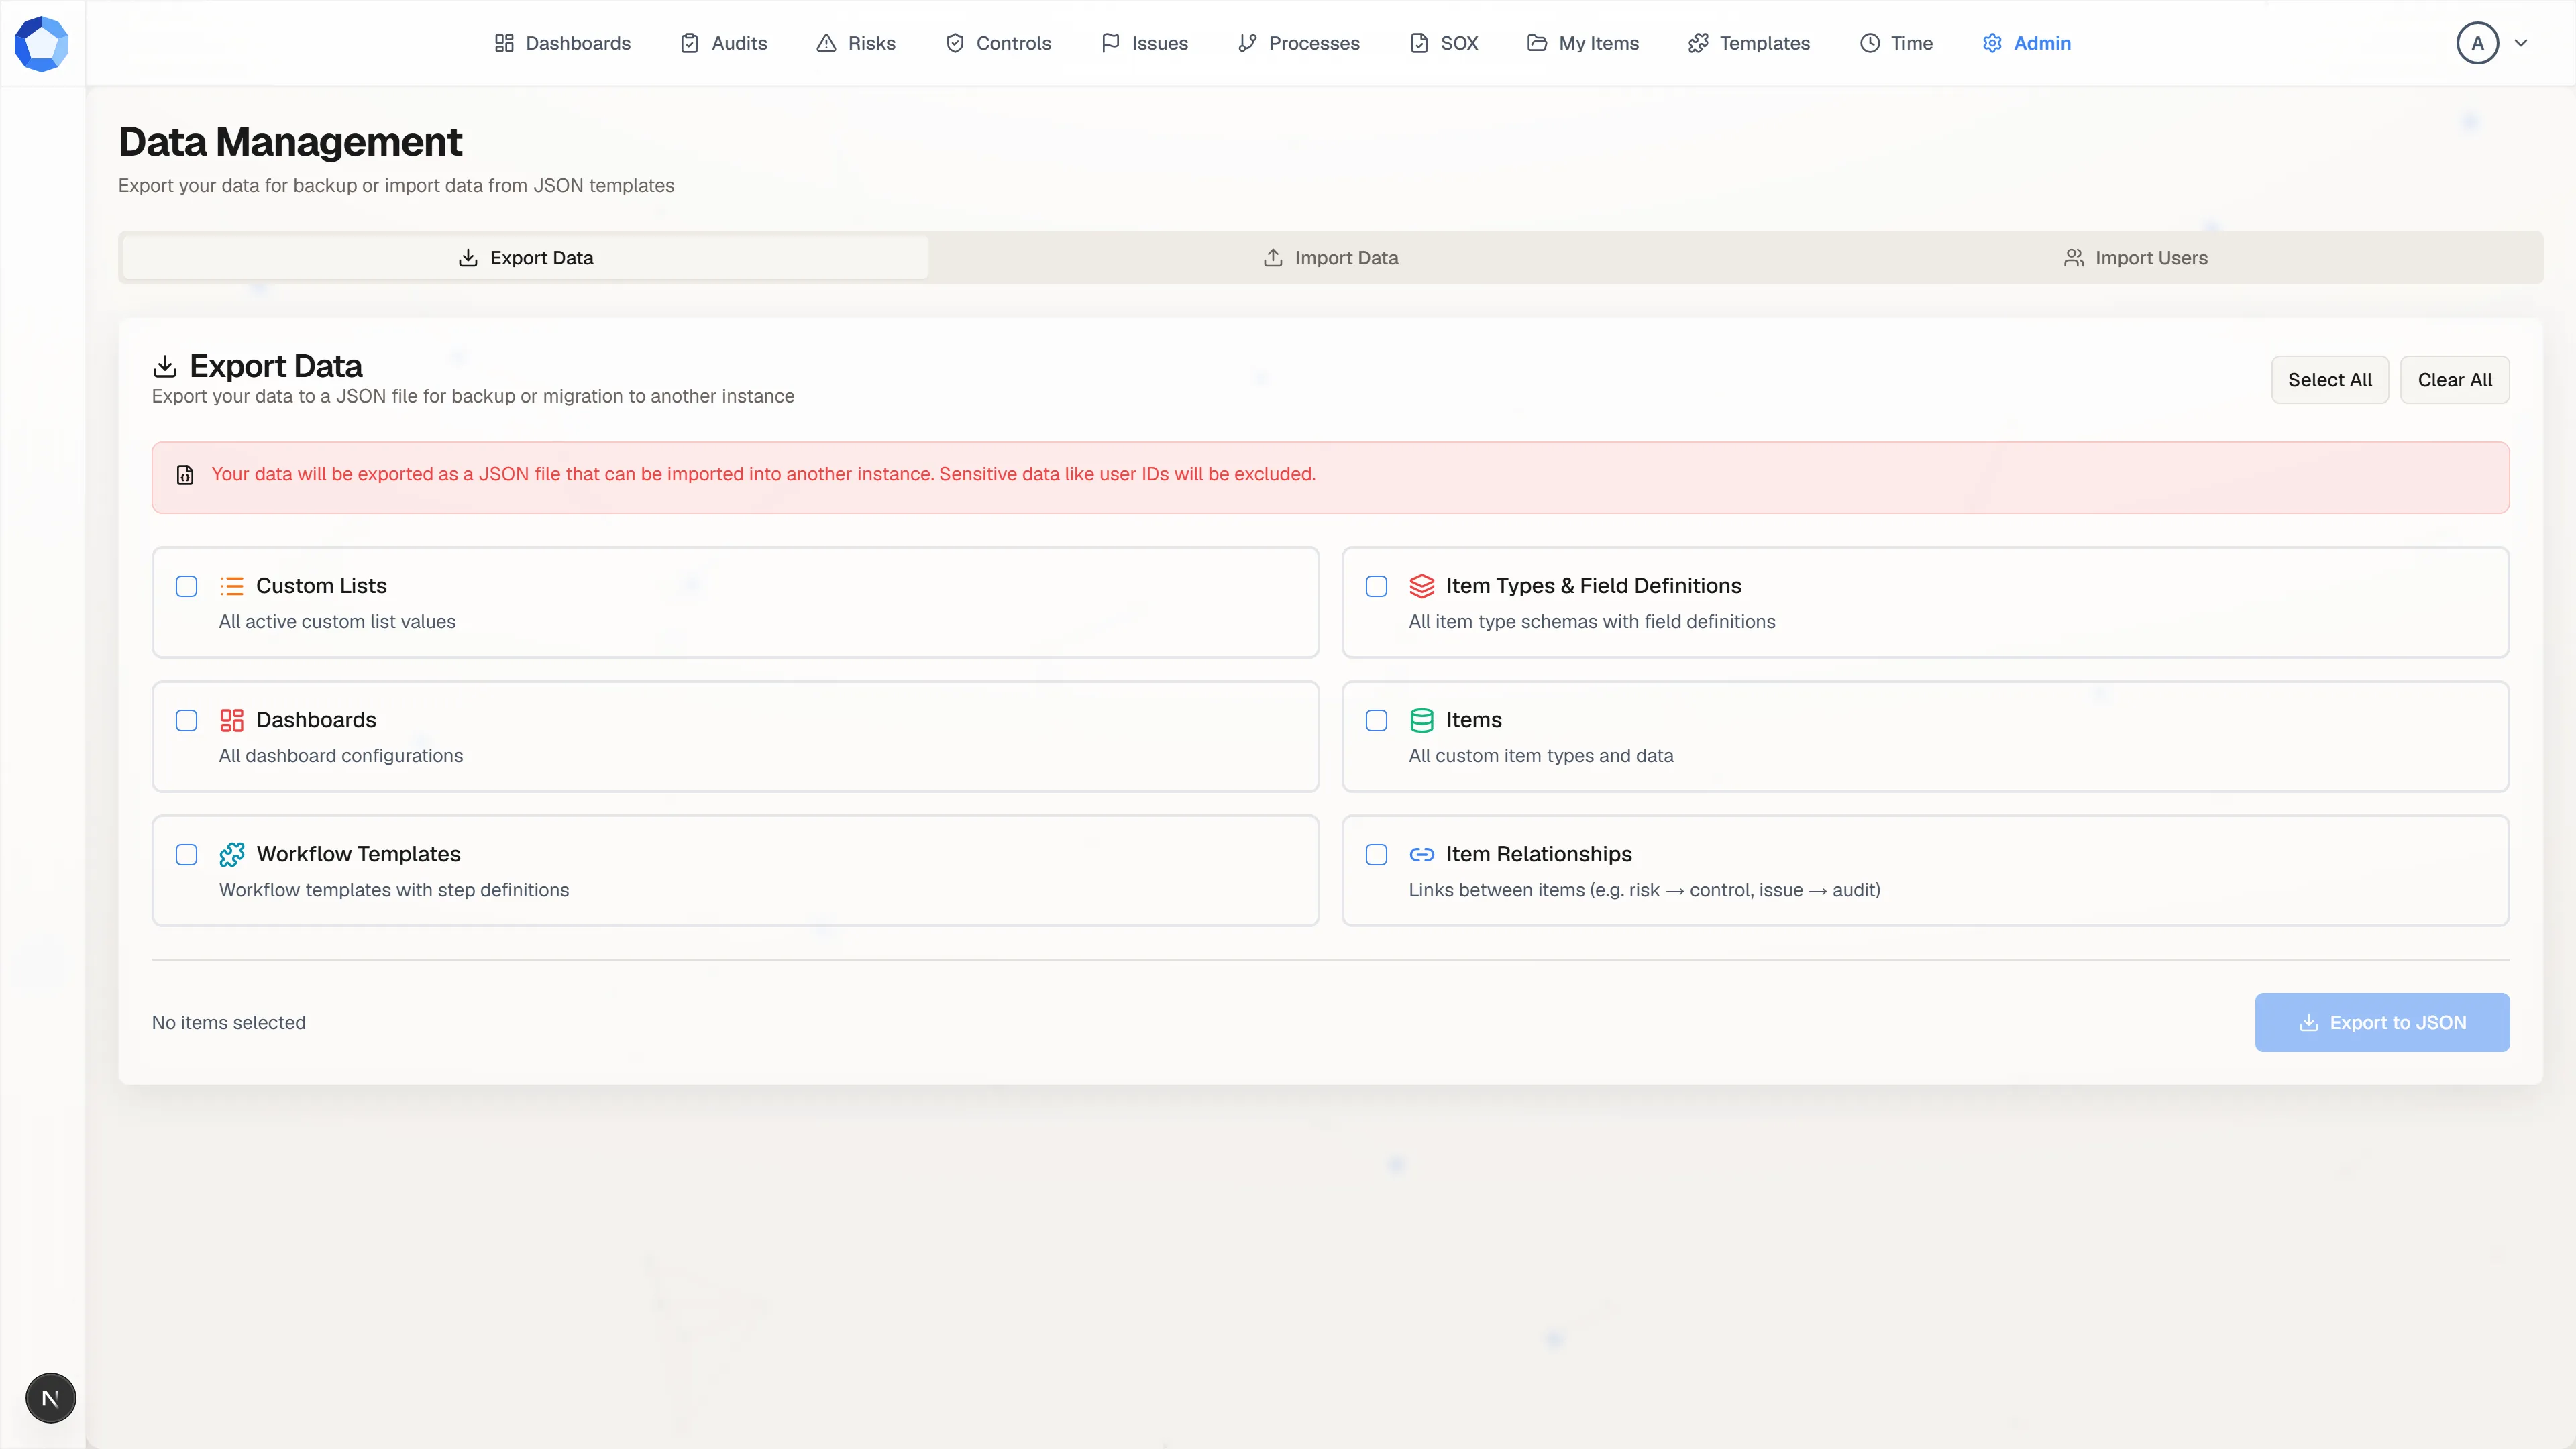
Data Management, from the Administration page, is a single surface for three jobs: taking a copy of what you have configured, loading a prepared dataset, and bringing a list of people in from a spreadsheet.
Three tabs, three jobs
Section titled “Three tabs, three jobs”Export Data writes your configuration and records out as a JSON file. Import Data reads that same shape back in. Import Users is separate and takes a CSV, because creating people is a different operation from creating records.
Take an export before any risky configuration change. It is the fastest way back, and diffing a before-and-after pair is the clearest way to see exactly what a change moved.
Choose what leaves
Section titled “Choose what leaves”Each data type is selected independently, one tile per section of the transfer file, so an export can be as narrow as a single kind of record. Select All and Clear All, at the top right of the card, set every tile in one move.
Pick the narrowest set that answers the question. A configuration backup is usually item types, custom lists, dashboards, and templates without the items; a migration to another tenant your organization runs usually wants everything.
Export to JSON
Section titled “Export to JSON”Export to JSON downloads the selected sections as one file. The notice above the selection says what is deliberately left out: the export is built to be importable into another instance, so identifying data such as user IDs is excluded rather than carried across.
That exclusion is why an export is a configuration and content artifact, not a backup of who did what. Ownership, approvals, and history stay in the tenant they happened in.
Import a prepared dataset
Section titled “Import a prepared dataset”The Import Data tab takes a .json file, dropped onto the page or chosen
from a file picker. Sections are processed in a fixed order, and configuration
rows update in place rather than duplicating, so fixing and re-running a
corrected file is the expected workflow rather than a last resort.
Results come back per section with created and updated counts and per-row failure details, so you correct the specific rows that failed instead of re-checking the ones that already landed.
Import a list of people
Section titled “Import a list of people”The Import Users tab takes a .csv. The only required column is email;
name and isAdmin are optional, and boolean values accept true/false,
yes/no, or 1/0. Download Template gives you a correctly-shaped
file, and the page previews the first rows before anything is written.
Each row comes back as created, restored, skipped, or error. Restored means a previously deactivated account came back, which is why a re-run of the same list is safe. Imported people arrive with no page access beyond the defaults, so pair the import with a pass through User Permissions.
The import file
Section titled “The import file”A transfer file is one JSON object with up to seven top-level sections, processed in this order:
customLists: the value lists fields and filters reference.itemTypes: record types and their field definitions.dashboards: dashboard definitions.items: an object keyed by item type slug, each value a list of item rows.workflows: workflow templates with their step definitions.workflowsAttached: running workflow instances, with their steps and linked items.itemRelationships: the links between items.
Order matters because later sections reference earlier ones: a custom list has to
exist before anything reads its values, an item type has to exist before its items
can import, and items have to exist before a relationship can join two of them.
You do not need every section in every file. A file can be an items update
alone, as long as the types and lists it depends on are already in the tenant.
{ "customLists": [ { "category": "issue-priority", "value": "high", "label": "High" } ], "itemTypes": [ { "slug": "issue", "name": "Issue", "fields": [{ "fieldKey": "priority", "label": "Priority", "fieldType": "SELECT" }] } ], "dashboards": [], "items": { "issue": [ { "title": "Example issue", "status": "OPEN", "fields": { "priority": "high" } } ] }}This example is illustrative rather than exhaustive: every section supports more settings than shown. See Item types and fields for the full set.
Running an import safely
Section titled “Running an import safely”- Start with a small test file, a handful of rows across the sections you are changing, not the full dataset.
- Use the slugs and field keys already configured. They are the join keys, and a typo creates a second thing rather than updating the first.
- Provide required fields on every row. A missing required field fails that row.
- Use stored values, not display labels, for
SELECTandMULTISELECTfields. See Custom lists. - Read the results, fix what failed, and re-run the corrected file.
Requests are size limited. Split a very large dataset into several files rather than sending one enormous request: by section, by item type, or by batch of rows, whichever divides your data most naturally.
Reading the results
Section titled “Reading the results”| Reported | Where |
|---|---|
| Created and updated counts | Every section. |
| Per-row errors with failure details | Every section. |
| Dangling relations | Additionally for itemTypes: a RELATION or RELATIONS field pointing at a type that is in neither the file nor the tenant. |
| Created and replaced counts | For dashboards, instead of created and updated. |
When not to use this
Section titled “When not to use this”Bulk export is built for configuration and modest data volumes, not large-scale analysis. To pull a lot of item data out for reporting, use query_data’s large-result export, which writes CSV or JSONL from a GraphQL query. That also lets you shape exactly which fields and which records come out, rather than exporting an item type wholesale.